getting set up
install claude code, and the optional terminal setup
Claude Code is a coding agent: it reads and edits files on your computer, runs code, and checks the result before it answers you. This page installs it, then sets up the terminal environment I use.
Two ways to run it
The desktop app or the terminal. Pick one; they are the same tool. The app is the shorter path if you do not already work in a terminal, and you can stop after First run.
Install: the app
- Download from claude.com/download and run the installer.
- Click the Code tab.
- Open the folder you want to work in.
On Windows, install Git for Windows first, or the app cannot open a local folder. macOS ships with Git. On Linux the desktop app is in beta; follow these steps.
Install: the terminal
curl -fsSL https://claude.ai/install.sh | bash
On Windows PowerShell, irm https://claude.ai/install.ps1 | iex. Then:
claude --version
If that prints nothing, the installer put the binary in ~/.local/bin, which is not on PATH on a fresh machine:
echo 'export PATH="$HOME/.local/bin:$PATH"' >> ~/.zshrc
source ~/.zshrc
which claude
claude doctor reports what is wrong if something else is. Claude Code is not in the free plan, so sign-in will fail on a free account.
First run
mkdir ~/agent-test && cd ~/agent-test
cp ~/somewhere/your-data.csv .
claude
In the app, open that folder instead. Then ask for something specific:
Describe this file: how many rows and columns, what each column appears to
contain, and anything that looks wrong or inconsistent.
It reads a CLAUDE.md from the folder you start it in, which is why the folder you choose matters — see project memory.
Keep the permission prompts on for the first week. They show you what it was about to do before it does it, which is how you learn where its judgment is good and where it is not.
Work in a git repository, or on a copy. An agent that can edit files can overwrite them. Git makes that recoverable. If the folder is not under version control, duplicate it first.
Put the folder in git
The warning above is the single cheapest precaution available, and it is three commands:
cd ~/my-project
git init
git add -A && git commit -m "before I let an agent near this"
From then on git diff shows you exactly what the agent changed, and git checkout -- <file> undoes it. You do not need a GitHub account and you do not need to understand branches; a local repository is enough for the thing that matters, which is being able to get back.
You can also just ask: “commit this before we start”, and “show me what you changed” when it reports done. Reviewing a diff is much faster than re-reading a file, and it is the habit that makes the permission prompts less necessary over time.
If none of this is familiar, the GitHub git guide covers it properly. Working on a duplicate folder is a fine substitute until you get to it.
Get the starter files
Everything these guides describe — the four templates, the hooks, the terminal config, the launcher — is in one repo: benning-lab/agentic-starter.
With git:
git clone https://github.com/benning-lab/agentic-starter.git ~/agentic-starter
Without git: on that page, click the green Code button, then Download ZIP, and unzip it. The same files. The only thing you give up is updates — with a clone, git pull fetches them — which is a fine trade until you want them.
put it somewhere it can stay
The hooks run from this folder, in place. Nothing is copied into a system directory, so if you later move the folder, rename it, or clear it out of ~/Downloads, the hooks stop firing. The shell reports a missing file, but whether that reaches you depends on where the harness puts it — the symptom you will actually notice is that the handoff stops appearing. Your home directory, or wherever you keep projects, is the right kind of place.
Then look before you run:
cd ~/agentic-starter
./install.sh --check      # prints what it would do, changes nothing
Reading a --check before running is worth doing with any install script you find on the internet, this one included. On a real run, this one:
- writes
~/.claude/settings.jsonfrom a template, pointing at the hooks in this folder — only if you do not already have that file; - creates
~/.claude/commands,~/.claude/skillsand~/.claude-assistant/session-recordsif they are missing; - with
--dotfiles, links the tmux and Ghostty configs below.
It never overwrites anything of yours: it reports the collision and skips.
./install.sh
If you already had a ~/.claude/settings.json — most people who have run Claude Code before do — it will have changed nothing, and the hooks are not on yet. Open settings.template.json, copy the hooks block into your own settings file, and replace __REPO__ with the full path to this folder (pwd prints it).
One thing to know before you switch the hooks on: the session-capture hook writes a condensed transcript of every session to ~/.claude-assistant/session-records/. That is deliberately outside your project folders, so a near-verbatim record of your work never gets swept into something you share — but it does mean those transcripts accumulate on your disk, and they are as sensitive as whatever you discussed. See project memory.
Optional: Ghostty, tmux, and a project launcher
tmux owns the terminal rather than the window, so sessions survive closing the window, switching applications, and dropping an SSH connection. With a launcher on top, I keep one live session per project and reach each by typing a fragment of its name. Ghostty is the terminal I run tmux inside.
brew install --cask ghostty
brew install tmux
The configs come from the starter repo, and the installer will link them for you:
cd ~/agentic-starter
./install.sh --dotfiles
That points ~/.tmux.conf and ~/.config/ghostty/config at the copies in the repo, skipping either one if you already have your own.
cc is a shell function: fuzzy-match a project folder, open a tmux window there, start the agent in it. If a window for that project already exists, it switches to that one.
# in ~/.zshrc
export CC_PROJECT_ROOTS="$HOME/projects"
source ~/agentic-starter/dotfiles/shell-cc.zsh
CC_PROJECT_ROOTS is where it looks for projects — set it to the folder your project folders sit in, or several, separated by colons. Open a new terminal tab afterwards, or run source ~/.zshrc, before the next command will work.
cc spacetime     # matches 2026_CxSpaceTime, opens a window there, starts the agent
cc               # attach to the session, wherever you left it
ccr spacetime    # same, but `claude --resume` to pick up a past session
Matching ignores case, punctuation and a leading YYYY_, so cc spacetime, cc CxSpaceTime and cc 2026_cx-spacetime all land in the same folder.
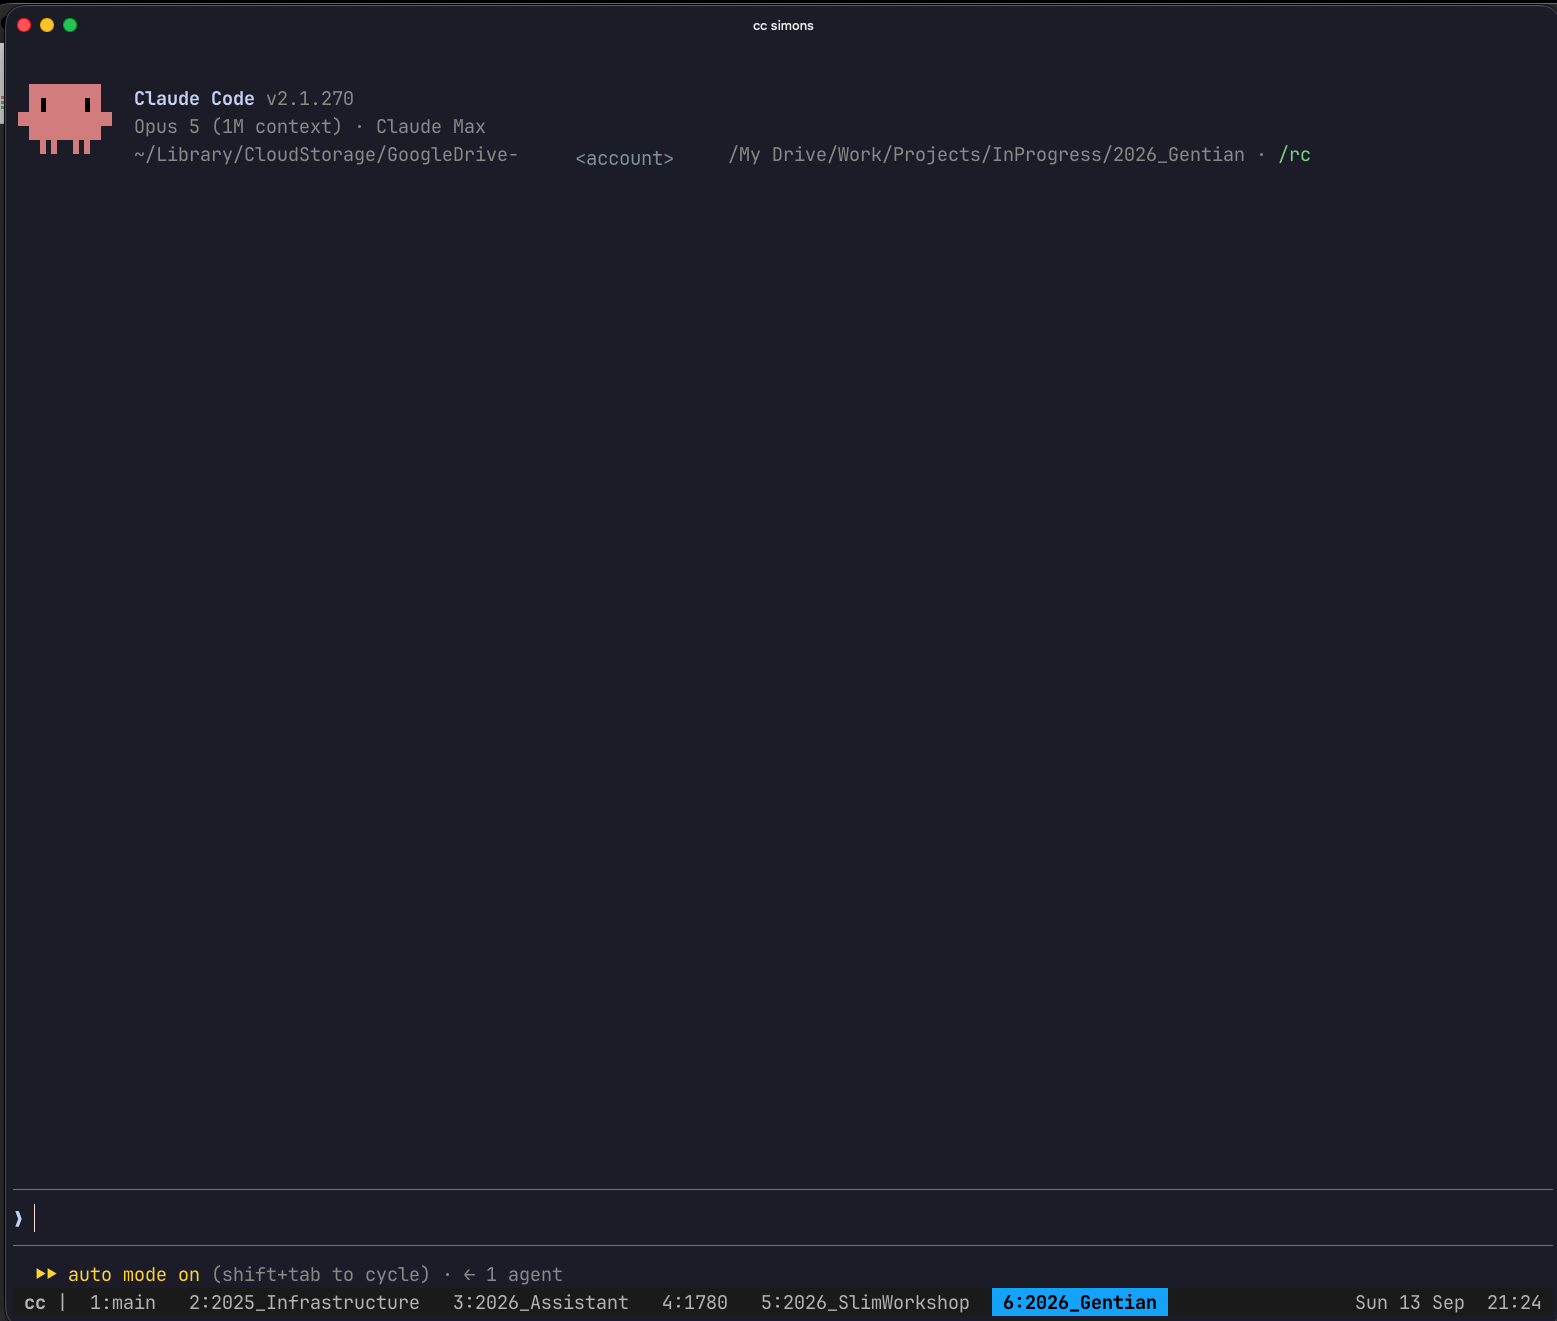
cc <name> or Shift+arrow, and closing the terminal leaves every session running. One gotcha: Ghostty parses a trailing # comment on a value line into the value, so the setting becomes something you did not write. Put comments on their own line.
Common issues
| symptom | fix |
|---|---|
which claude is empty after a successful install | The installer puts the binary in ~/.local/bin; add that to PATH and open a new tab. |
| Sign-in fails with an account that works elsewhere | Claude Code is not in the free plan. |
| The app cannot open a folder on Windows | Install Git for Windows. |
cc opens a window but nothing starts | The desktop app’s bundled binary is not on PATH; install the standalone CLI above. |
Next: Project memory — the files that make it remember your project.